Firebase
以下是配置 Firebase 项目的分步指南,包含图片和说明。
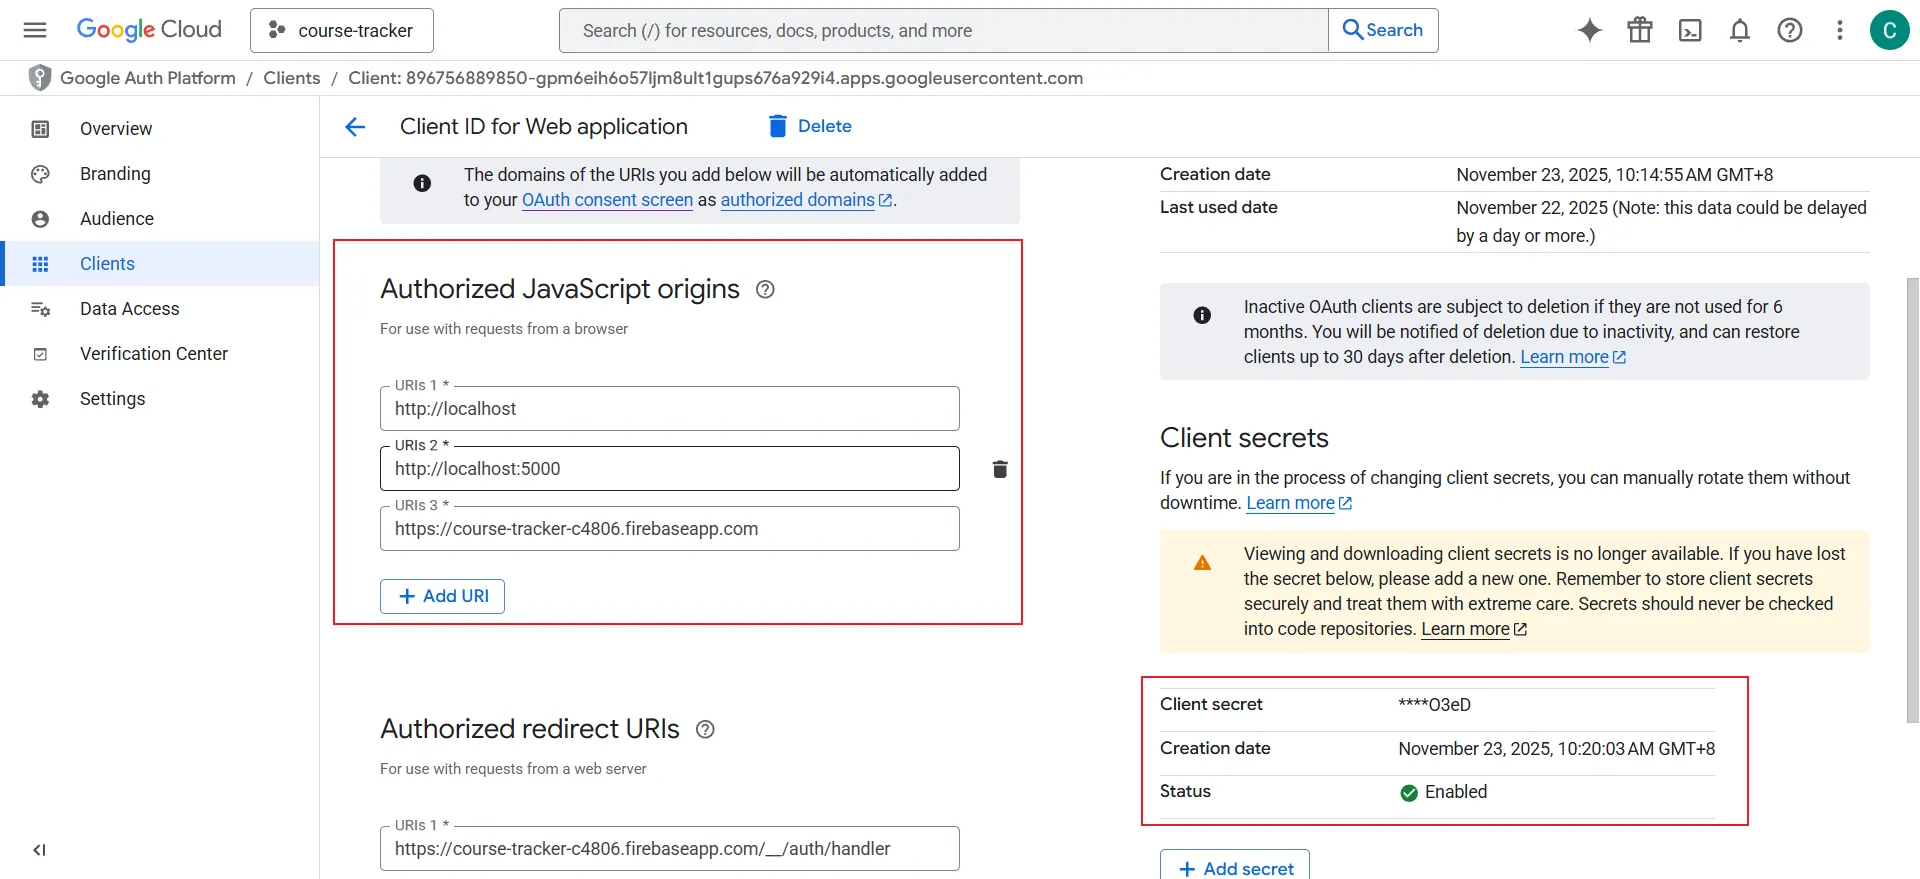
1. 设置 clientId 和密钥
第一步是找到项目的配置详情,包括 clientId 和 API 密钥。这些对于将应用连接到 Firebase 服务至关重要。你可以在 Firebase 控制台的项目设置中找到它们。
在 Firebase 项目设置中,你可以找到 Web API Key,在 "Your apps" 部分,你会看到每个已添加应用的 clientId。
访问此链接:
2. 启用 Google 登录
要允许用户使用其 Google 账户登录你的应用,你需要在 Firebase 身份验证设置中启用 Google 登录提供商。
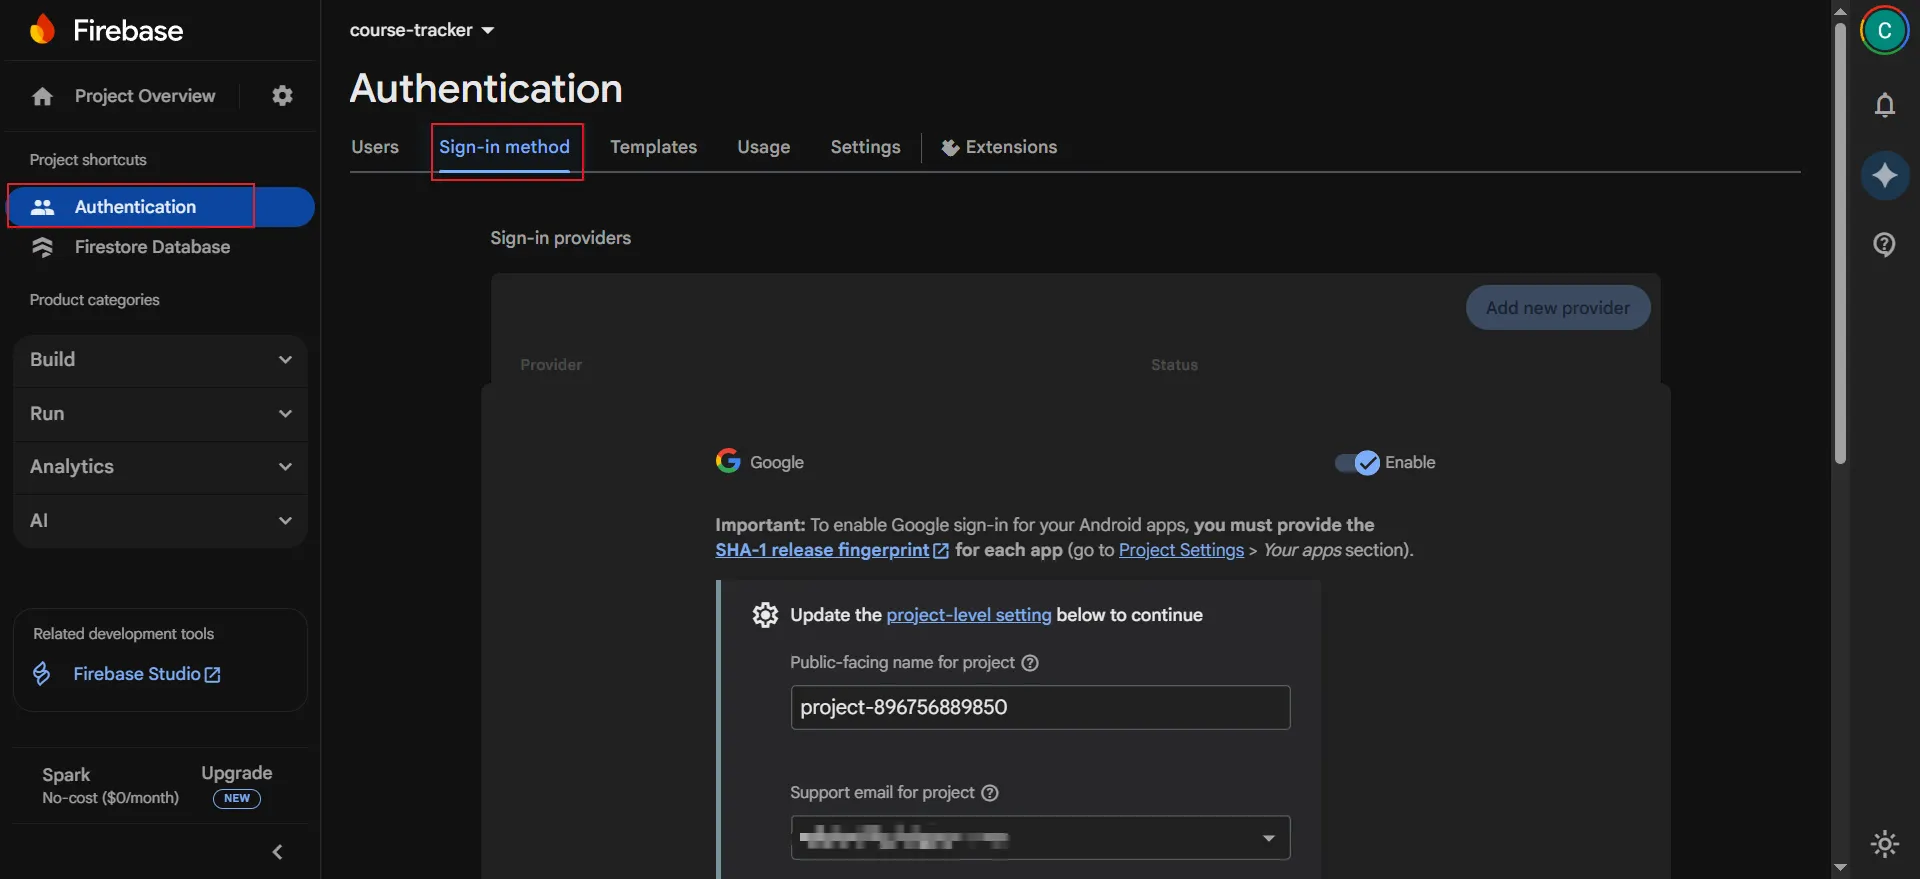
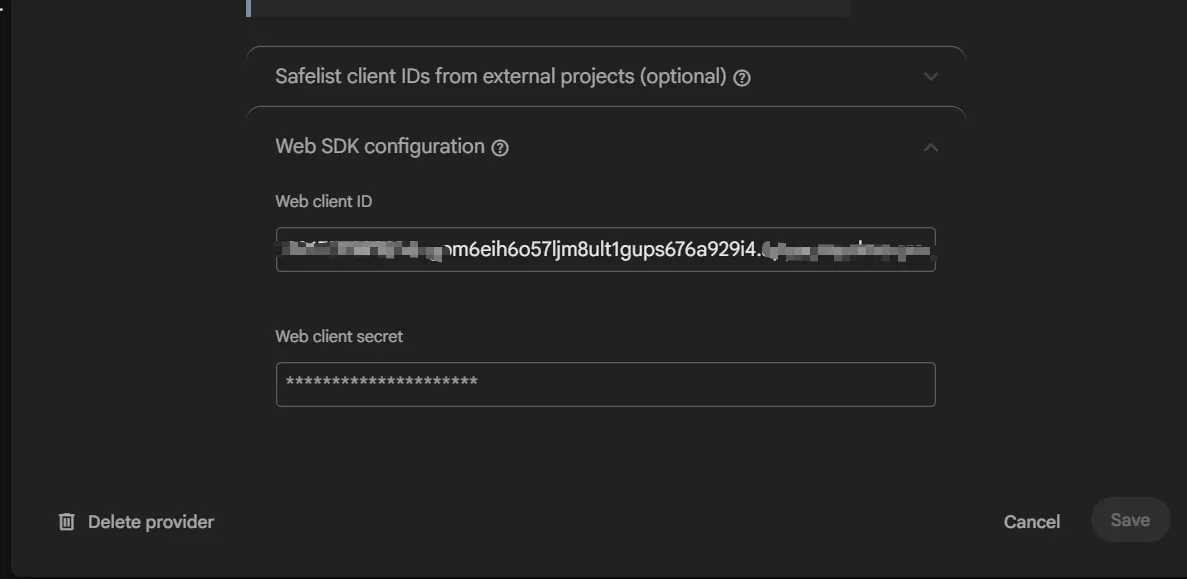
还需要 Web 客户端 ID 和 Web 客户端密钥,你可以从第一步获取。
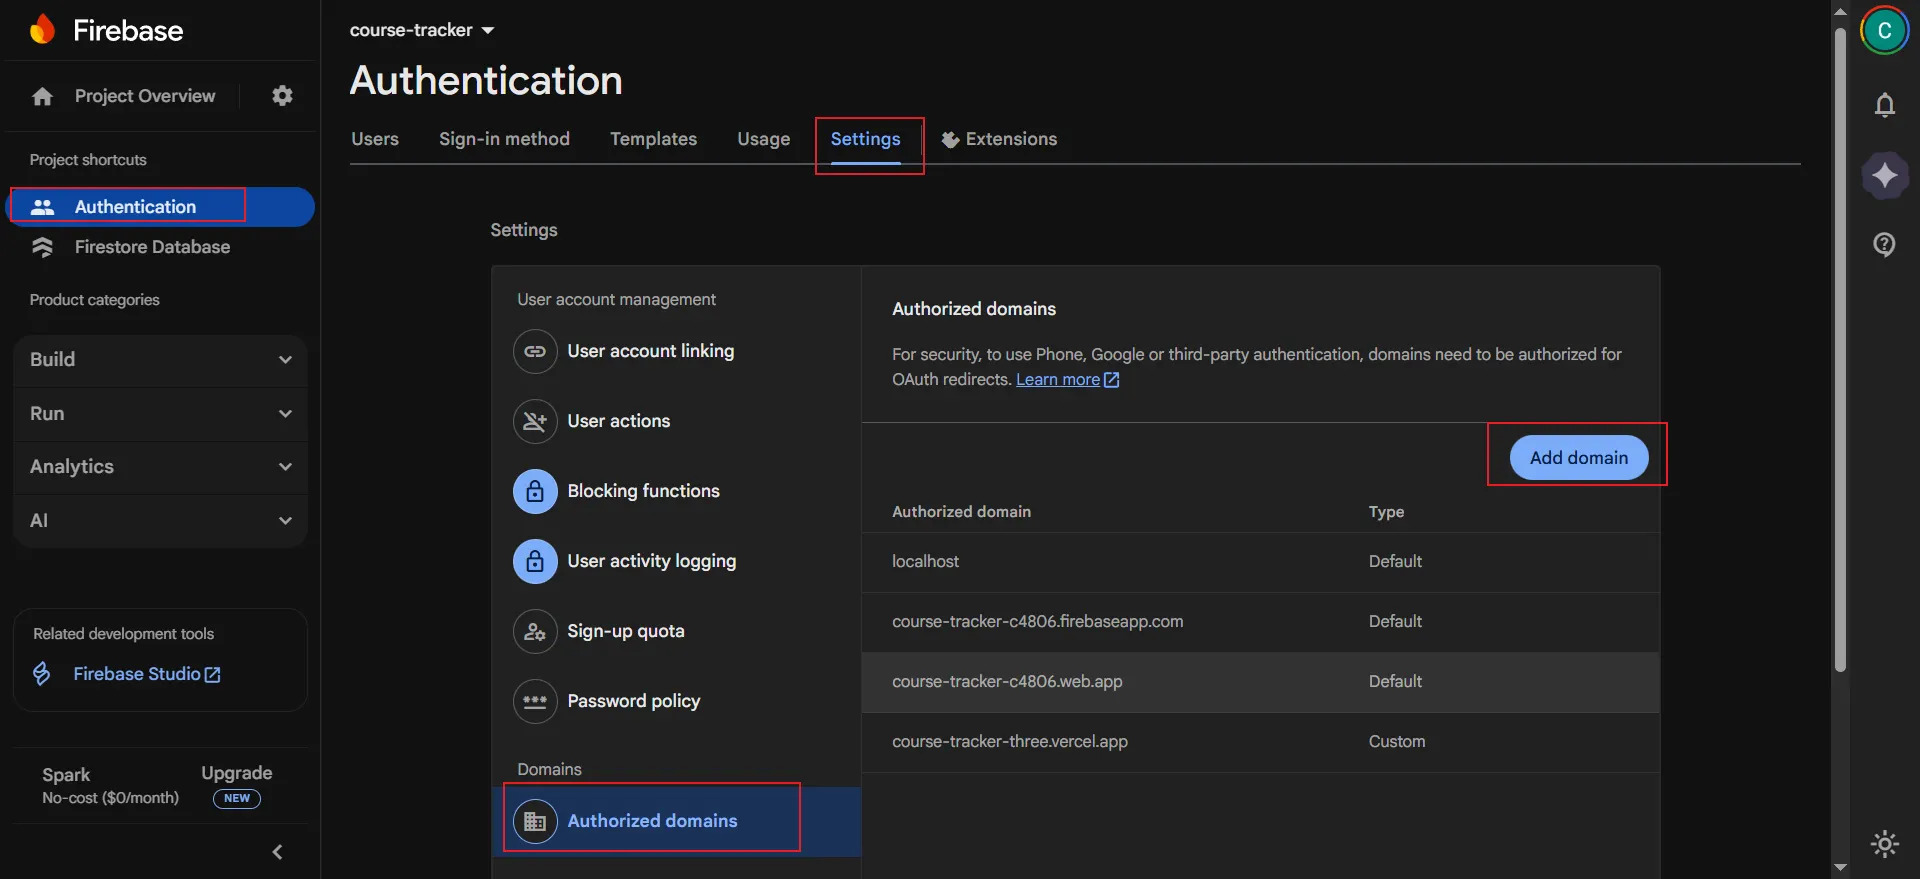
3. 添加登录域名
出于安全原因,Firebase 仅允许来自你明确授权的域名的登录。你需要将应用托管的域名添加到授权域名列表中。
仍在身份验证部分的 "Sign-in method" 选项卡中,向下滚动到 "Authorized domains",点击 "Add domain" 输入你的应用域名。
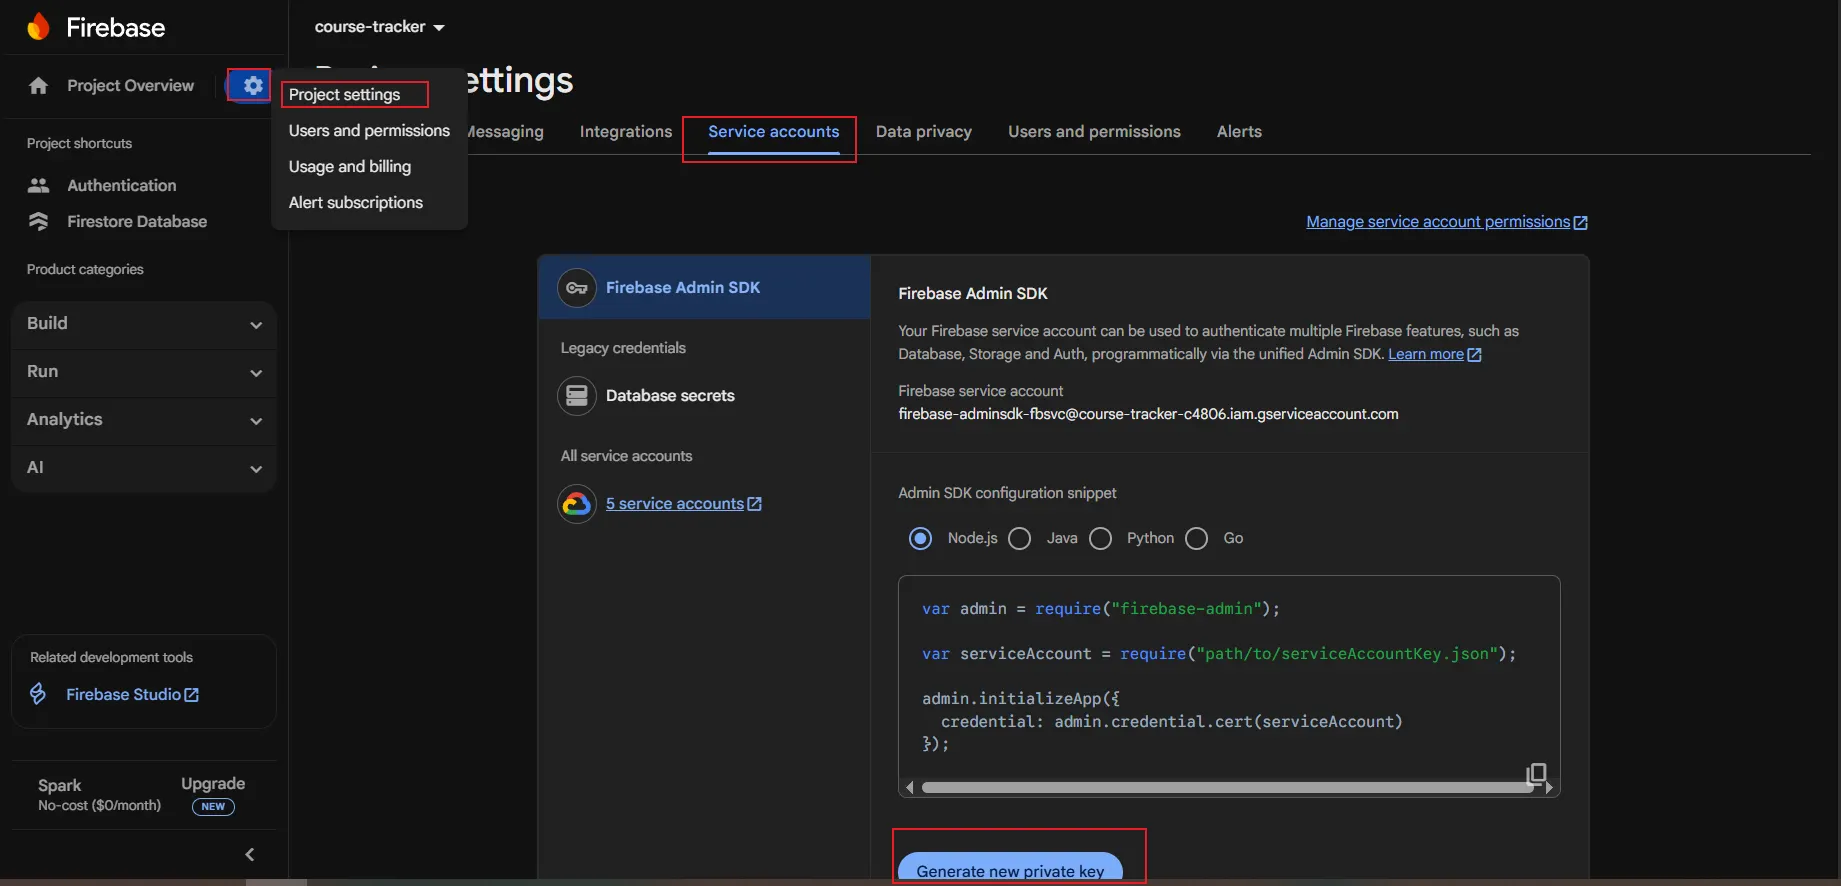
4. 设置 JDK 管理员
要从特权环境(如服务器)执行管理任务,你需要使用 Firebase Admin SDK。这需要具有必要权限的服务账户。你可以在项目设置中为该服务账户生成私钥。
返回 "Project settings",选择 "Service accounts" 选项卡,然后点击 "Generate new private key"。这将下载一个包含服务账户凭证的 JSON 文件,你可以用它来在服务器端代码(如 Java、Node.js、Python)中初始化 Admin SDK。
- 配置规则
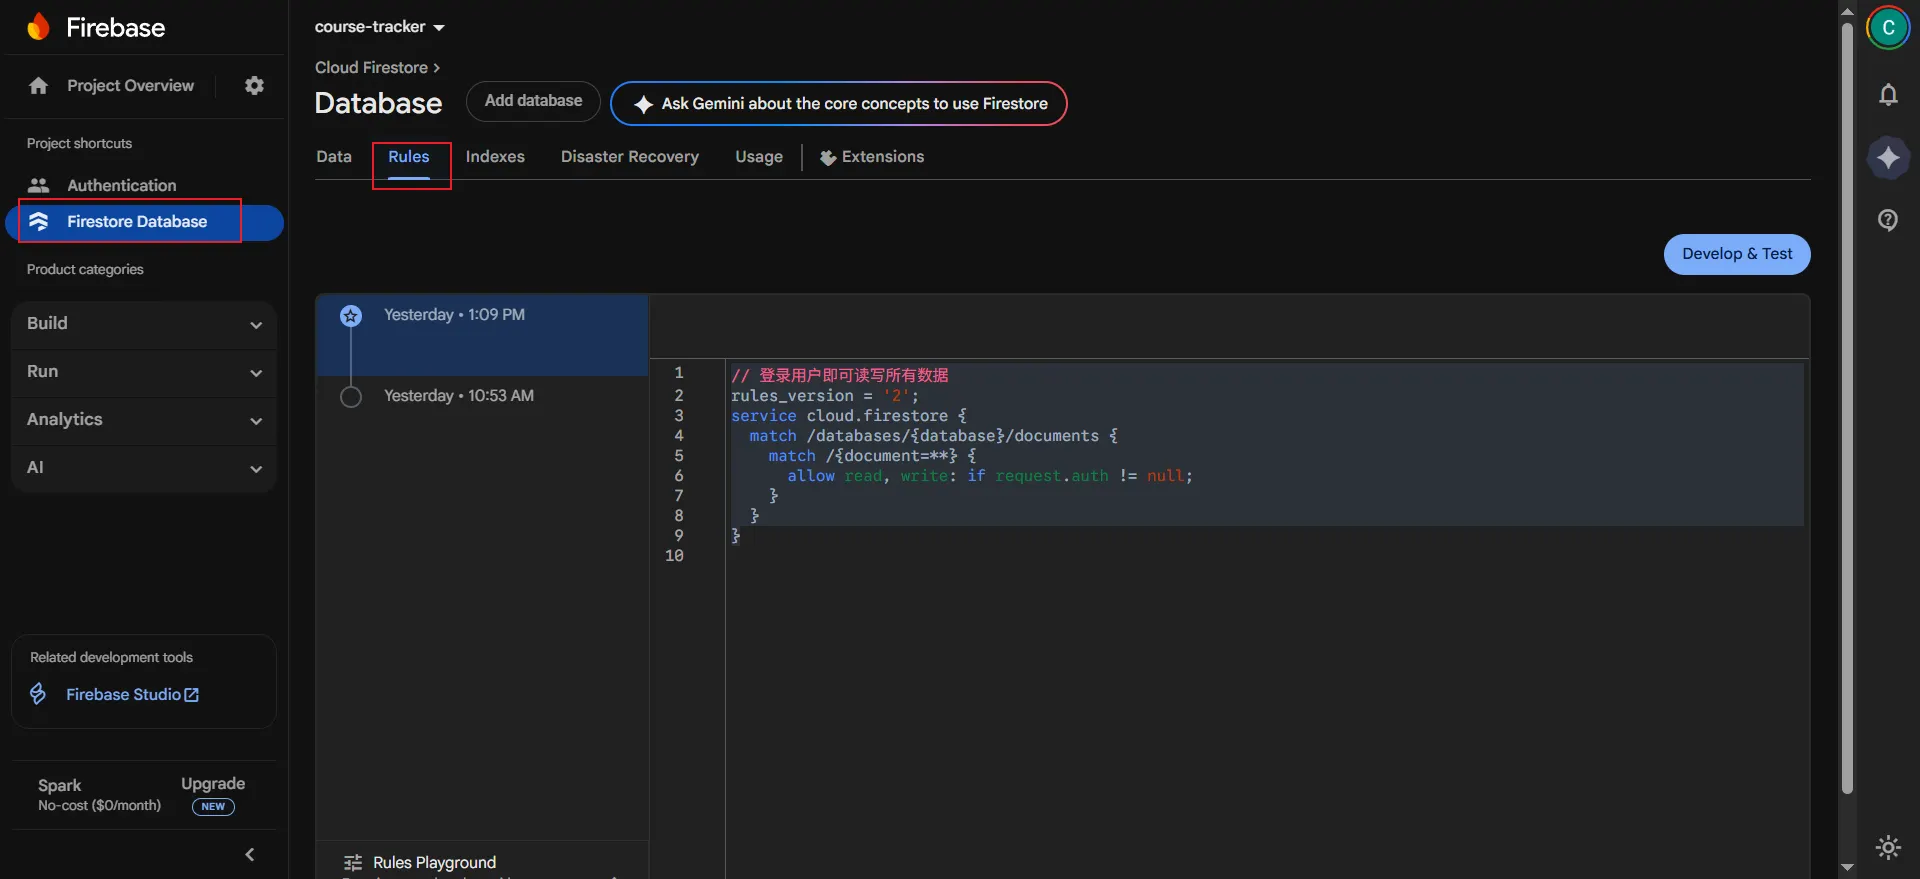
// 登录用户即可读写所有数据
rules_version = '2';
service cloud.firestore {
  match /databases/{database}/documents {
    match /{document=**} {
      allow read, write: if request.auth != null;
    }
  }
}
协议
本作品代码部分采用 Apache 2.0协议 进行许可。遵循许可的前提下,你可以自由地对代码进行修改,再发布,可以将代码用作商业用途。但要求你:
- 署名:在原有代码和衍生代码中,保留原作者署名及代码来源信息。
- 保留许可证:在原有代码和衍生代码中,保留Apache 2.0协议文件。
- 署名:应在使用本文档的全部或部分内容时候,注明原作者及来源信息。
- 非商业性使用:不得用于商业出版或其他任何带有商业性质的行为。如需商业使用,请联系作者。
- 相同方式共享的条件:在本文档基础上演绎、修改的作品,应当继续以知识共享署名 4.0国际许可协议进行许可。